Last Update: June 1, 2020
One thing is certain: the novel coronavirus COVID-19 is currently keeping the world in suspense. Following the official announcement by the UK government of school closures many nursery and school photographers are now facing even greater challenges.
For this reason, we would like to work with you on immediate measures and long-term, sustainable solutions. We would like to answer the first questions that you have already asked us in this article.
Note: With the help of your feedback, we will continuously expand and revise our content. We look forward to your ideas and suggestions, which you can send us using the form at the end of the article.
Subscribe now to receive updates from GotPhoto on coronavirus:
Table of Contents:
- How do I react to the establishment closing and photo day being cancelled due to this or other reasons?
- How can I cushion financial losses through school and nursery closings?
- What should I do when my lab closes?
- How do I behave correctly on the photo day in times of the coronavirus?
- What can I do in the meantime following school closures?
- How should I communicate with customers and visitors to my website?
- I would like to switch from proof cards to online sales at short notice. How do I proceed?
- I fear that the nursery or school will close before I can sell my photos. How should I handle it?
- What should I do with my employees?
What we know about school returns so far:
- Prime Minister Boris Johnson announced on Sunday, May 10 that year 6, year 1, and reception classes should return from June 1.
- However, there is widespread concern from local councils, teachers unions, and parents that returning so soon puts people’s health at risk. Equally, there is concern that schools are not prepared for this return.
- The Local Government Association which represents many local councils in England has sad councils should have access to coronavirus testing data, so they can decide when at what pace to reopen. Read more about this here.
- Since the outcry, the Government has appeared to row back and say it is not a fixed date to return and they are open to speaking with councils and teachers to decide the best course of action.
- The plan is for schools in Wales, Scotland and Northern Ireland not to reopen until the summer term.
- All UK schools have been closed since Friday, March 20.
How do I react to the establishment closing and photo day being cancelled due to this or other reasons?
Closed facilities and canceled photo days are a challenge for every nursery and school photographer. However, it is very important that you show your understanding of why the decision has been made.
Try to plan an alternative date for early summer with the establishment in the hope that the coronavirus situation has eased by then. This reduces the risk of filling your calendar with too many appointments in the autumn when schools have likely started again. If the earlier appointment is not possible, you can always see if there is time in autumn instead.
If this offer is not accepted, give the establishment time until the situation has relaxed and a return to everyday life is possible. Do not push for an answer as it can be perceived as inappropriate given the circumstances.
How can I cushion financial losses through schools and nurseries closing?
The UK Government now has a dedicated Business Hub providing small businesses with all the information they need to get through this crisis. This includes information on how to apply for grants, universal credit, and the Coronavirus Business Interruption Loan Scheme and how to defer VAT payments. Visit the Business Hub here.
UPDATE:
On Thursday, March 26, the British Government unveiled new measures to help businesses and the self-employed. The highlight is that they will pay the self-employed a taxable grant worth 80% of their average monthly profits over the last three years up to £2500 per month.
This is available for three months but can be extended. The first payment will be in June and backdated, but criticism remains that by then many businesses and self-employed will be severely stretched financially.
Read full details on how to access this new financial package.
Previous Measures – Friday, March 20:
Pledge to pay 80% of wages, up to £2,500 per month, backdated to March 1 for three months or longer, if required, for small businesses. Grants will be made available to businesses within weeks. (gov.uk)
Other notable pledges included the ability for self-employed people to access Universal Credit at a rate equivalent to Statutory Sick Pay for employees, plus the extension of the Corona Business Interruption Scheme from six-months interest-free to 12-months interest-free.
Previous Measures – Tuesday, March 17:
Temporary loan schemes, deferred tax periods and tax support through HMRC’s Time to Pay service and refunds for businesses and employers that are required to access Statutory Sick Pay. The Federation of Small Businesses (FSB) has further details here.
Coronavirus Business Interruption Loan scheme from up to £1.2m per business to £5m with no interest payable for six months. Further details can be found on Small Business. This loan scheme was later extended to be interest-free for the first 12 months and is available from Monday, March 23.
Additionally, the FSB also advises checking how your business insurance works in the case that your company has to temporarily close due to Coronavirus. Check if you have Business Interruption cover in your commercial insurance policy, and then if this includes an extension for “notifiable diseases”. Coronavirus has already been declared a notifiable virus by the British Government. You will then need to check specifically with your provider if the coronavirus is covered or request for it to be added.
Again, the FSB has plenty of helpful advice for businesses that will be affected by the coronavirus. The federation is updating its page regularly and includes a range of useful materials.
Further information:
- How do I react to the establishment if it is temporarily closed or the photo day has been cancelled for other reasons?
- What should I do with my employees?
Do you have tips or questions regarding the coronavirus? We would love to get your feedback.
What should I do when my lab closes?
Due to the coronavirus and on the basis of direct advice from the British Government that ‘non-essential’ businesses should stop production whenever possible it is likely that labs will announce temporary closures soon or already have.
This will likely affect delivery times and any current open orders. However, there are steps you can take to deal with this:
- Send an email to your customers and potential customers on active jobs indicating that there will be: “Possible delays due to the coronavirus. These are difficult times and we hope for your understanding. Your orders will be shipped as soon as normal operations pick up again.”
- Do not proactively offer cancellations to your customers, since production will eventually resume once businesses have returned to normal and your awesome products and photos will be delivered.
- Emphasise download options in your shops for your jobs. This can help attract further sales in this uncertain period.
Note for GotPhoto Customers: We are aware that our lab partners have officially announced temporary closures. We have added a notice to all UK photographer shops indicating to your customers that delivery times will be affected.
We ask for your understanding at this difficult time. Production and delivery will continue as soon as legal circumstances allow. We are in close contact with all partners and will update you via newsletter, social media and in the config as soon as we have any new information.
How do I behave correctly on the photo day in times of the coronavirus?
To protect everyone it is crucial you ensure that neither you or your photographers are sick or feeling unwell when attending a photo day.
Important: We recommend following these tips from the British Government and NHS on how to recognise the symptoms of coronavirus, how to prevent its spreading and what to do if you do have it.
What can I do in the meantime following school closures?
The UK will need social distancing until at least the end of the year, according to the UK’s chief medical officer. Thus it makes sense to begin preparing for this and consider new approaches. It is extremely important to think of potential ways to ease any worries that there may be from schools and nurseries about photographers creating any additional infection risk.
GotPhoto can assist with a contactless approach that still enables you to provide school and nursery photos, and we would be happy to discuss this directly. Book a time to speak with us here.
Many photographers have been discussing what they can focus on during this uncertain time and we have gathered together their insights here:
- Re-open old galleries and make special offers to your existing customer base
- Special offers for Mothers Day and Easter
- If you haven’t already, make the switch to online sales (find out more below)
- Switch your orders to direct shipping
- Offer downloads more prominently in your online shop
- Sell gift cards/vouchers for in-studio sessions
- Utilise newsletters to keep your customers informed what you are doing during this time
- Offer online courses
- Optimise your website and social media pages
- Refresh your marketing and acquisition materials
- Research new props, backdrops, and equipment you can use
- Educate yourself and prepare for when this is over: Look for useful software and tools. Watch demos to see how they can help your business grow as soon as things are back to normal.
To connect with other school photographers on this issue, we recommend joining Facebook groups such as:
How should I communicate with customers and visitors to my website?
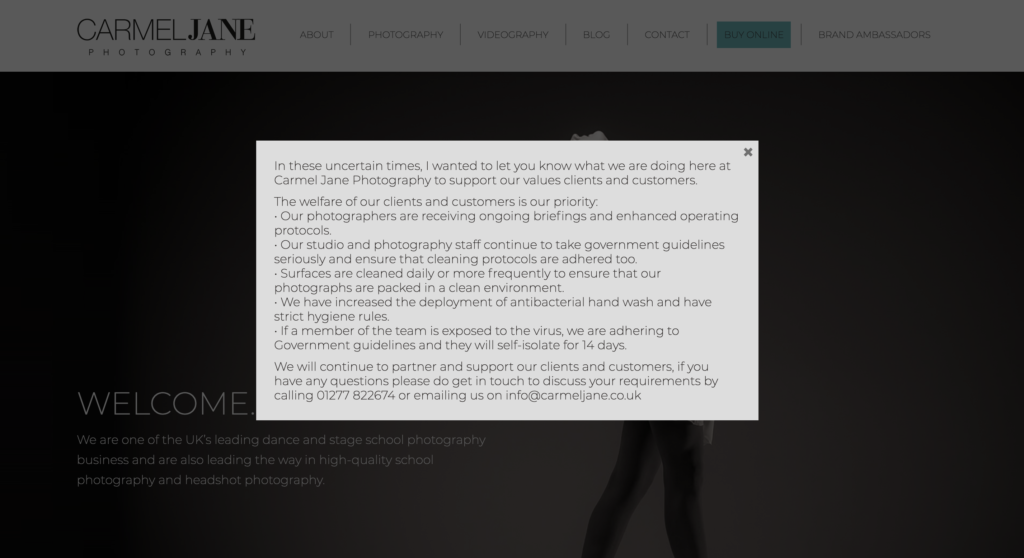
During these uncertain and tough times, we encourage you to be as communicative and open as you can be to both your potential customers and existing customers. It is important to let them know how you are handling the coronavirus crisis. Being forthcoming will foster trust with people visiting your website.
Carmel Jane Photography has taken a positive step to communicate with visitors to their website by displaying this notice below on the homepage:
I would like to switch from proof cards to online sales at short notice. How do I proceed?
In Nurseries:
Our recommendation, especially for photos in nurseries is to not confuse the establishment with the question of switching to online sales before the photo day in this tense time. Instead, print out the required amount of QR cards you need for the shoot in advance and take them with you to the photo day.
On the photo day, seek out an opportunity for a conversation with the nursery management and explain that you would like to switch to online sales so that the establishment is not additionally burdened with proof card sales or money collection. If the management cannot or does not want to make a decision at short notice, then it is up to you. You can either photograph the QR cards anyway and do not hand them out to the management or parents or you proceed with the proof card method.
In Schools:
We recommend that you speak to the school in advance and convince them of the advantages of online sales. There are useful arguments in this ‘How To Win New Customers’ white paper.
I fear that the nursery or school will close before I can sell my photos. How should I handle it?
Switch your order to online sales with direct shipping as soon as possible. You don’t have to go to the establishment after the photo day. The parents order the photos in the online shop and pay digitally via PayPal or Stripe. The orders are then sent directly to the parents.
What should I do with my employees?
Updated:
On Friday, March 20 the British Government announced any employer can apply to the HMRC to have up to 80% of a member of staff’s salary paid. This is capped at £2,500 a month and can be backdated to March 1 and run for three months. Find out more here.
Businesses can consider during this tricky period of uncertainty introducing temporary lay-offs and short-time working as a measure to deal with the shortage of work and to avoid redundancies. However, employers can only do this if it is expressed in the individual employee’s contract. If it is not, both parties may agree to alter the contract to deal with this situation.
The public workplace expert, The Advisory, Conciliation and Arbitration Service (ACAS) has further details on how lay-offs and short-time working agreements function.
If employees cannot work because they have to look after their child due to the nursery and school closures, Section 57A of the Employment Rights Act 1996 gives employees the right to a reasonable amount of unpaid time off work because (amongst other reasons) of the unexpected disruption or termination of arrangements for the care of a dependant.
However, the Government also announced in the recent 2020 Budget that the Statutory Sick Pay will be extended to those who are caring for someone in isolation and that this should be recognised as sick pay. The FSP has further details on this here.
Note: This article will be revised. We look forward to your questions, comments, and input!
Would you like to be informed about all the latest news about coronavirus? Subscribe to the updates of this article!
Our aim at GotPhoto is always to support and protect the interests of nursery and school photographers. Therefore, we call on the government to give a greater level of support to all photographers, especially those who work as solo self-employed or entrepreneurs, in times of the corona crisis. Join us in standing up for yourself and others in your situation!
Individual school and nursery photographers, and of course photographers in other areas, often work as solo self-employed entrepreneurs and are therefore particularly hard hit by the current corona crisis. Sales often fall overnight and it is not clear when the establishments will reopen and new orders can be accepted.
The British Government has now adopted a package of measures to support companies in coping with the current situation such as the Coronavirus Business Interruption Loan Scheme, and a pledge to pay 80% of wages for employees for three months or longer. You can read more about these here.
Despite several new measures being announced over the last week and agreement that this is the biggest subsidy undertaken by a British Government, there remains a sentiment that the self-employed are still being overlooked.
Therefore, we would like to see the self-employed offered more protection with 80% of their wages being offered on the basis of their previous year’s income or profits.
Additionally, we endorse the demand of the Federation of Small Businesses to introduce more radical measures such as 3-6 month holidays on National Insurance Contributions, PAYE; changes to insolvency; and the suspension of paying rent, tax and utilities for the same time.
With such measures, we believe more businesses outside of the traditional sectors of leisure, hospitality, and retail can survive.
To this end, we have launched a strong petition for photographers, with which you can signal your support for the demand.
Note: You will be redirected to change.org and therefore any donation requests will come directly from the site and not GotPhoto.

Sign up for our updates on coronavirus and how it is affecting the school photographers
As we witness those massive firework displays and raise our glasses for the new year, it is important to acknowledge what great symbolism this beautiful holiday season brings with it – whether it is joyful celebrations, spending much needed time with friends and family or having a moment of reflection on the whole year.
GotPhoto is again reminded of what an honour it is to be part of the photography community. Helping each other succeed on this journey motivates us every single day. And as 2019 comes to a close we would like to say a huge thank you for allowing us to be part of your journey.
And what a journey it has been – as this infographic below demonstrates. We cannot wait to see what numbers we rack up together in 2020!
GotPhoto is very proud to announce it has won the Best Business Potential Award at Visual1st – the leading international photo technology conference in San Francisco!
Competing against 30 other tech companies, the judges were extremely impressed by the product and service GotPhoto had built and developed successfully, both in the US and Europe.

Awards Judge Anna Dickson, Visual Lead, Image Search at Google, said: “GotPhoto shows that mature industries like school photography can be successfully disrupted when offering innovative tools and services that enable gig photographers to serve their local communities.”
CEO of the GotPhoto Group, Markus Posselt, who received the award, said: “I’m happy that our clear focus on preschool and school photography put us in a unique position where we can really deliver on our mission to make photographers more successful.
“I am delighted we have received this reward in recognition of that and I thank everyone who has supported us on this journey so far and continues to do so.”
About Visual 1st
Visual 1st is the premier global conference focused on promoting innovation and partnerships in the photo and video ecosystem. Regularly it hosts executives and entrepreneurs at photo and video app development startups, mobile device vendors, carriers, cloud storage providers, software companies, print product providers, camera manufacturers, and many others.
For further information visit www.visual1st.biz/
At GotPhoto, we pride ourselves in making our photographers’ lives easier. But we also understand that the life of a school photographer is not always easy. Many of you run your own business, meaning you have people depending on you for their livelihoods, as well as of course needing to provide for yourself and your own family.
With busy schedules and often having multiple jobs in progress at once, it can be hard to keep up momentum and avoiding burnout. We asked some of our photographers to give their top tips on keeping up a healthy work/life balance. But first, an overview of the symptoms and causes of burnout.
What is burnout?
Burnout is caused by being in a constant state of stress. All of us feel stress – both positive and negative – every day. Usually, there is some relief from it in our daily lives. Sometimes though, there is no relief from stress for several days (or even weeks) at a time. This is when burnout can occur.
Burning out provokes feelings of physical and emotional exhaustion, social detachment, and inadequacy. Each of these can hurt your photography in different ways. The experience is different for everyone, but the first step to truly dealing with it is to recognise the different symptoms. Let’s start there.
How Does It Affect You As A Photographer?
Exhaustion
Exhaustion is more than simply feeling tired or fatigued. Exhaustion can manifest as a weakened immune system, leading to increased illnesses, forgetfulness, loss of appetite, anxiety, anger, and/or depression. Naturally, none of this is good for your photography, or your life outside.
Photography, and especially volume photography, is highly physically demanding. Wedding and school photographers are constantly on the go all day long. Physical exhaustion can therefore really impact your life.
The same can be said for emotional exhaustion. Most photography evokes some emotion. It is difficult to do this when all you are feeling yourself is numb. Feelings of apathy will show in your images.
Cynicism and Detachment
Loss of enjoyment in photography is usually the first thing noticed by those suffering from burnout. This is accompanied by pessimism, or feeling as if your skills will never improve. Burnout can cause you to experience detachment—feeling disconnected from others. You may miss your photo club meetings, stop returning emails or pull away from other activities. This is ironic because one of the things that can often help is to become more involved in groups that support you.
Ineffectiveness and Lack of Accomplishment
It can seem that no matter how hard you work at photography, you never see your skills improving. You can develop feelings of hopelessness because of this, even though your photography is developing at the same rate as before. It’s just your perspective that’s changed.
All of these feelings combine to make you less productive, and even though the burnout may have started in photography, it can spill over into other aspects of our lives, such as relationships or your family.
How To Avoid A Photography Burnout
Get a Hobby (Other than Photography)
At some point, you need to put down the camera and do something different. Yes, going out and taking pictures of subjects other than what you focus on for business can be relaxing, but you are still very close to ‘work mode’. Learn to play a musical instrument, read, volunteer…do something other than taking pictures for a little while every week, to have a ‘vacation’ from the business.
Talk to Your Friends and Family – In Person, and Not About Work
Actual human interaction can do you a lot of good. An hour or two spent with family or friends can recharge your batteries – as long as you aren’t talking about how much work you have to do when you get back to your computer. Relax. Let your hair down. Have a little fun now and then so that you can continue to feel excited about your work!
Time Management is Everything
Especially when you don’t have set working hours, it’s important to keep track of the time you spend on your work and the time you spend on other things. It’s easy to do a bit more editing and get booked for an extra shoot, but just keep in mind that you also need to schedule some time for things that are not photography related. You might think: ‘How am I supposed to do less? All these things have to be done.’
But ask yourself: which things are important in your work and which things can you change to save time? Maybe you just have more shoots planned than you can handle, or maybe there are things in your workflow that could be done in a more efficient way. Because in the end, a responsible workload means more personal happiness and health.
Step Away from The Computer at Regular Intervals
Get up from the computer. Let your eyes focus on something else. Take a short walk. Do some jumping jacks. Just don’t stare at the screen continuously for eight hours a day. It’s not good for you. Many photographers would likely rather be out taking pictures than editing or running the business side of things. But if you are running a business, these things need to get done. However, that does not mean that you can’t take a break occasionally! Indeed, you really should.
Stick to the rules for regular office places such as a 10-15-minute break every two hours. You will be surprised how much better you feel.
Making the most of your time is incredibly important and of course, GotPhoto can help you with plenty of those tedious administration tasks. This is crucial in getting you away from the desk. Slow Road owner Erica Morrow explains further the difference it made for her in this article.

Advice From Other Photographers

Tim Macdonald, Image Art Studio
“Stay ahead of the game. Always look ahead to deadlines and preparedness for shoots. Make sure the deadlines you give are reasonable and reachable. Do not promise then not deliver; if anything, underpromise and overdeliver. That’s what your accounts/customers will remember.
“Accomplish things one day at a time: set your goal for the day or make a simple ‘to do’ list, and make sure you get it done. Then repeat the same process for the next day.”
Want to hear more wise words from Tim? Take a look at his photographer showcase for the inside track on his school photography business.

Larissa Lord, Larissa Lord Photography
“My biggest recommendation is to try and set business/desk hours. As a society, we’ve become quite accustomed to immediate responses, but I find if I can give clients/prospective clients a time where they know I will be available to answer emails or phone calls, then I don’t feel as guilty when my desktime is done.
“I think it’s so important to try and reduce the elements of business that tie you to your desk. If you have a good client management software system, software to streamline your workflow – that’s golden. Getting all set up in the beginning reduces the amount of time you spend at your desk later.
“Make time for yourself: to walk outside, reconnect with the things you enjoy, and pick up your camera for your own personal work too. The less bogged down you feel, the happier you will be. And please remember: just because you say no to time at your desk doesn’t mean you have to say yes to another commitment that will occupy your time in a stressful manner! If you’re thinking no internally, say no externally! You’ll be happier for it.”
Like how Larissa thinks? Hear more from her as she takes a closer look at her a few of her favorite images in her photographer showcase.

Erica Morrow, Slow Road Photo
“With the nature of our work being so seasonal, the most important thing you can do is give yourself grace. In the busy periods, give yourself permission to work hard and give your very best to your work. It may feel disproportionate in a snapshot, but the pendulum always swings back. There are times when you simply have to dig deep and just get down to work!
“Then when things are slow, give yourself the same grace and don’t get down on yourself. Enjoy the rest, the deep breaths, the time to play. Find the beautiful part of whatever season of business you are in and give it everything you’ve got!”
Want to hear more advice and tips from Erica? Dip into her photographer showcase for her perspective on style, interacting with kids, and more.

From the GotPhoto Team
At GotPhoto, we also work hard on various different projects and tasks, always with the aim of making our photographers’ lives easier. We asked some different people around the office what they do to keep themselves focused and in top form.
Clara from Marketing puts it down to “meditation!” Taking some time to slow down and relax can never hurt, but it doesn’t work for everyone…Kai from Sales prefers to head off to a soccer game or play some sports himself. Remember, what works for some won’t always work for others.
Finally, we have some words of wisdom from GotPhoto USA CEO, Benedikt: “There are a few little things that you can do:
- Number One: Change your clothes to make sure your body understands when you are home.
- Number Two: Establish set reflection sessions.
- Number Three: When you eat, take time for it and concentrate on the food; it actually doesn’t matter what you concentrate on but it should be something not related to work.”
We hope you’ve picked up some handy tips and strategies that will help you on your way to your best season yet this fall! Please note, if you’re experiencing chronic exhaustion or fatigue, please seek professional help or see a doctor. These tips are designed to help put together a healthy work/life balance, but not to be used as medical advice.
Further Resources
Want to read up more on the topic?
Here’s a podcast where a photographer discusses just this topic.
Forbes also wrote a comprehensive breakdown for people of all industries on what to watch out for and what the potential causes could be.
Gallup carried out a scientific study, this one focusing specifically on employee burnout, and also put together some useful solutions for reducing or managing burnout.
Got any top tips of your own? Let us know in the comments of the Facebook post for this article!
Without a doubt, editing is the most in-depth and time-consuming part of school photography, aside from the actual school or nursery photo day itself. In a school with 350 children, for example, you’ll take somewhere between 3000 and 3500 photos altogether, even before you’ve started uploading and editing them.
Such large quantities mean a strong editing workflow is absolutely vital. Not only does it save you time and effort with photo editing, but it also helps you continue to find pleasure in your work.
In this article, you’ll find our best tips for getting ahead with photo editing. For now, our top piece of advice: stick to one clear vision. After that, practice makes perfect.
Get Off on a Good Foot
It goes without saying that digital photography relies on strong raw images. Aside from resolution, you can also influence factors like image detail and sharpness while still working on photo day, to avoid unnecessary work during editing.
The success of this depends of course on the conditions of your shoot. It makes a big difference whether the photos are taken indoors with flash or continuous lighting, or outside in bright daylight, or even taking candid snaps of children playing outside.
In principle, here’s what you need to know for indoor photography:
- You have full control over the light conditions, including the exposure, the white balance and sharpness, and of course the direction of light.
- It pays to think about the field of view while you’re still taking the photos and make it ‘right’ at the moment. You should also be aware that some photo products might have a different aspect ratio to your raw images. That’s why it’s always a good idea to leave a little extra room around the main subject.
…and for outdoor photography:
- Frequent shifts in lighting conditions make controlling the exposure, white balance, etc., much harder.
- When taking candid pictures, that’s where keen reactions and flexibility will come into play. Working quickly causes other factors to suffer: sharpness (shaking, motion blur, inaccurate focus), exposure, white balance (particularly shadows) or framing.
Tip: Whenever you have the opportunity while working outside, try to use flash and reflectors to maintain constant light conditions and make your job easier later on.


Data Import
We all know that sinking feeling after a photo day when you realise something has gone awry and then – even worse – you have no backup.
So above all else: keep your data safe. At the very least make copies as soon as possible. To be extra safe, do it on the same day the images were taken.
This shouldn’t be just one step in your photo editing process, but be carried out on a regular basis.
Structure and Organisation
We cannot recommend a clear and well thought out organisational structure enough. Although it often goes unnoticed, good organisation is of the utmost importance.
Don’t fall into the trap of creating a maze of folders! Particularly when it comes to different editing methods, selecting photos, and the myriad of other tasks that fall to photographers, a clear folder structure is vital. Original and edited photos need to be easy to find to avoid creating unnecessary duplicates and doubling up on work.
And sorting and selecting photos is different nowadays than simply having folders on your hard drive. The smart, quick and regular collections from Lightroom are a nifty little tool for example when it comes to avoiding files piling up. You can read more about their functions in Lightroom’s User Guide. Amongst other things, they make it possible to give your own photos a star rating. For speedy photo selection, it can be very helpful.
Photo Editing in post-production
Photos taken indoors generally take less time and effort to edit in comparison to those taken outside – regardless of whether you use Lightroom, Capture One or Photoshop.
Every photographer has their own personal editing style and it can be an incredibly enjoyable and rewarding process putting the finishing touches to an excellent photo. However, while we do not wish to dampen your spirits it is worth keeping in mind that:
Lengthy photo editing quickly eats into your profits.
This is just a fact, and we know many of you are keen to grow your businesses. Building a strong photo editing process and streamlining it where necessary is therefore vital for any professional school or nursery photographer.
Tip: Take a good look through your current workflow. Write down how you go about editing. You might find in a couple of places that the order is not quite clear and it depends more about the individual situation and your own photographer instinct.
Now compare your notes with the following tips and tricks. What can be adjusted or changed? What are you dissatisfied with? What’s going well?
Your workflow: From the first step to a finished photo, in school and nursery photography
In our experience, it makes sense to start off with the edits that affect the whole image, or even several photos. Take care of the details and minor changes for individual photos at the end.
A way to do this is to utilise the useful pre-sets option in Lightroom. Any serious school or volume photographer will know the importance of utilising pre-sets in Lightroom when it comes to the editing process. This can save a wealth of time when it comes to dealing with thousands of photos. Having pre-sets that recognise your lens, plus the typical adjustments you make for tones, levels and presence is vital. Once you have used your pre-set for all the imported photos you can begin culling and come round to more detailed edits later on.
Apart from that we recommend the following order:
1. Cropping/trimming and rotating
This is one of the most time-consuming steps. At the same time, it has the biggest effect on the end result, as it affects the entire composition of the image.

2. Lens corrections
Enough said: do your lens corrections!
3. Exposure, contrast, and levels
As we know, tone is not the same as colour. The tone describes the intensity of every pixel from bright white to deep black. As small changes to these can have great effect on the entire photo, it’s best to get the colour settings tidied away early.
4. White balance and colours
If the white balance needs extensive corrections, maybe because an indoor photo was taken with outdoor settings, it’s best to do this step before levels. If there’s not so much to do, then you can go ahead with saturation and other effects.


5. Correct selected areas
This step includes, amongst other things, dodging and burning the exposure, as well as selective colour correction. However, it’s quite rare in school and nursery photography, as it eats up a lot of time.
6. Reduce blemishes
If you used a high ISO in the dark, or if the image was too underexposed, getting rid of some blemishes or distortion might be necessary. Since the changes made prior to now can also affect such flaws, it makes sense to address them at this stage.
7. Sharpness
Sharpness refers to adjusting the contrasts. The brightness of adjacent pixels along the borders within a photo affect the sharpness. The higher the contrast, the sharper the subject.
8. Retouching
If all of the other steps haven’t already helped to sort out small flaws, then now is the time.
9. Other special effects
Of course, the fewer steps you actually needed to use from those listed here, the faster the process is.


Then and only then…
Leave any changes that affect the image resolution until the very end, and always keep the original file! A good image editing workflow allows you to change your mind about certain editing steps and also be able to adjust them without sacrificing quality.
Your workflow affects…
…successes and missteps, happy customers, good timeliness, profits and losses, and above all you own personal satisfaction.
If there is no system behind your workflow in post-production, unnecessary stress will keep popping up. It’s also probably the reason behind the quality losses that you’ll want to avoid.
Your ideal workflow won’t be built in a day. It’s a process, like all the good things in life. Every step will need to be practiced and refined a few times before you’ve developed a well-oiled routine.
It might make sense for you to put up a list of your steps in your workplace or office before you get started. If your thoughts begin to wander after a step, you can then take a look at your organised workflow on the wall, and ensure you remain on the road to success.
Every photographer has their trusty camera bag that accompanies them on every shoot. But what about beyond that? There is a whole world of useful tools out there that could make your life easier – besides GotPhoto, of course.
We’ve compiled a useful list of both physical tools and software resources that could help improve and refine your school photography business, based on our expertise as well as recommendations from our photographers.
Tools on Wheels
First up is a lifesaver for those long photo days. A small stool with wheels has reportedly saved the knees of one of our photographers. One like this can let you sit down and move freely around the child, with an adjustable height to suit any angle. With time saved from getting up and down, and dignity saved from not having to shuffle around on the floor, it is a photographer must-have.
One added bonus from our photographer: his chair can also make a sound like a whoopee cushion, helping even the grumpiest of preschoolers crack a smile!
Another handy purchase that your bones will thank you for is a rolling trolley. With all the equipment a school photographer needs to carry, it’s important you don’t weigh yourself down with bags and boxes. If you haven’t already made the change to wheels, you might want to consider making the switch now.
Pocket Essentials
For getting technical on the fly, having a set of white balance cards is always a must-have. This set has a neutral 18% grey card, but you can often find a set that matches your preference and style where necessary. You can also use more silvery ones as a portable reflector for macro photography, for example, if you’re getting some extreme detail shots at prom or during a senior shoot.
School photography can often be a hands-on job, moving around the child to get the best angle, and even using the other hand to entertain or engage them. If you don’t have room for a tripod during a session or prefer freedom of movement, a paracord could be your answer. Placing one end under your foot and attaching the other to the screw on the underside of your camera creates a makeshift stabiliser.
All of these smaller items might get lost in a big camera bag. To keep them all together, along with memory cards, batteries and other bits that are easily mislaid, a small tin can work wonders.
Extra tip: an elastic band makes sure it stays fully closed, and can then also be used on a shoot to attach something to your camera or flash, such as small toys or mini-reflectors.
Think Outside the Box
Anyone who works with kids knows they are not the most reliable of coworkers. Keeping a stash of tasty bribes to hand out is a great way to keep them on your side. You don’t need anything too fancy or time-consuming to eat, but something like small pieces of fruit or boiled candy can turn even the most resolute of frowns upside down. Remember: always make sure to double check with the school beforehand for approval!
If you’re out and about on the hunt for acquisitions, a portable projector is a great addition to your sales bag. Something like this is compatible with laptops and mobile devices without breaking the bank, but the more you spend, the higher the quality. With an on-the-go projector, you can throw your images up onto any blank wall or surface, regardless or what kind of technology the school you’re visiting might have. That way, you can show off your photography skills behind you while you talk business.
Handy Software…
For organisation
Not everything in a school photographer’s kit can fit in their camera bag. Of course, so much of our work is now carried out online. For photographers with a growing business and multiple photographers working on jobs, finding ways to coordinate various schedules can be tricky. That’s where an online employee scheduling tool can save the day. Here are a couple of different options some of our photographers use that could suit your company as well:
- Google Docs: a simple solution. Create a Google Sheet timetable for the month and put in all the upcoming jobs as they arrive. Employees can then go into the document and color it or mark it as taken in some other way. With changes being shared immediately to all users, it leaves little room for error with no software costs.
- Homebase: a more dedicated platform. Homebase is designed for this specific use, and allows you to allocate jobs according to week or month. You can also copy schedules across to replicate previous weeks. What is more, Homebase will track the number of hours individuals have worked accordingly, to make sure everyone is getting their fair share.
It’s not only your photographers that might need organising. If you offer private sessions or senior shoots, you might need to have a system for client scheduling. It might be the first time a client is coming into contact with your brand, so it’s vital to have a smooth and easy experience for them if you’re going to encourage them to invest their time and money further in your business.
- YouCanBookMe: You can connect this system with your already-established calendar, whether that’s Apple, Google or Microsoft. You then further specify your availability around those times and YouCanBookMe will offer free times to anyone wanting to book a slot with you. Appointments are automatically copied into your personal calendar for you to approve. With full automation, it is very straight-forward to get their system up and running. One downside is that there is little customisable payment integration, so you might need to send invoices to clients directly.
- SimplyBook: This software works in a very similar way, but has the added bonus of enabling payments within the system. Depending on how you take session bookings, this could work in your favour for collecting deposits. Clients can also make group bookings, and you can set up automated reminders for yourself, employees, or the clients themselves to make sure everything runs smoothly on the day.
- Calendly: For improved flexibility and the ability to hold group meetings for both employees and clients, Calendly doesn’t leave much at the wayside. You can also set limits for the number of meetings per day, so you don’t get snowed under with too many clients at once, and create buffers to give yourself a break between meetings or sessions.
For photography
There’s nothing worse than capturing dozens of special memories for families and friends, and then realising those images have suddenly vanished. That’s why an essential part of being a photographer is being ready for such circumstances. Some of our top picks for photo recovery are:
- PhotoRec: an open source service suited for the programmers amongst us, or those wanting to keep data to themselves.
- Exif Untrasher: the knight in shining armor for Mac users.
- Recuva: another alternative for those using Windows.
We’ve all had that sinking feeling where we open a memory card after a big photo day and some of the images have corrupted. Just as with photo recovery, school photographers should be prepared with a trusted photo repair service to come and save the day. File Repair is a free service that works on most operating systems for almost any file type. Whatever your need, it will likely be able to help.
For anyone who works outdoors and uses Apple products, The Photographer Ephemeris helps you make the most of natural light outdoors, and is a great addition to your digital wallet. With a mapped calculator of the sun, moon and the Milky Way, you can see in advance how the light will fall at specific times and locations. Never again will you forget a key light or umbrella to get the perfect angle. You can also save locations for future use, so you never have to waste time searching for the ideal angle again.
Do you have any personal favorites of your own? Have you used any of the tools listed above? Let us know in the comments by heading over to the Facebook post related to this article.
It’s summer and school is out, but we know a photographer’s job is never done. To give yourself the best autumn yet, we’ve put together a checklist to help you get ahead for the new school year.
Look Back
To make decisions looking forward to the upcoming season, it can be beneficial to first look back at last year. Making decisions in advance only works if you base them on such insights. Be sure to compare season to season, as other times of the year are influenced by other factors and can result in misleading conclusions.
Self Assessment
As the photographer, you will be able to identify many successes and failures yourself. It can be helpful to pick a specific photo day or school to start with, to focus your memory. Think about answering the following questions:
- What went well on photo day? What didn’t?
- What created stress for you?
- Did you carry out repetitive work?
- Where did you get stuck, either during preparation or on photo day?
- Where did you invest the majority of your time? Did it pay off?
Identifying problems or issues in these separate areas often means needing separate solutions to resolve them, which we will come to later. For now, consider which ones had the biggest impact, both on the business and on you personally.
Stakeholder Analysis
You are not the only person who might have valuable insight into the running of your volume photography business. Ask other relevant groups, such as customers, institutions, employees, and partners (e.g. labs, system providers), what they think about the same questions as above. They work closely with you and so might see things you don’t. And of course, the customer experience is important in any business; considering what they would like to see in future is always an advantage for maintaining customer loyalty.
Review Financials
It’s not all about processes and stress points; at the end of the day, a business is a business. Sometimes it has to come down to the money. Put together a business plan that includes any costs or losses, revenue, and split it into different categories, such as sports, schools, seniors, or studio sessions – whatever suits your workflow best. Don’t let the term business plan trick you into thinking it has to be pages long – a few simple tables can be enough to illustrate what you need:
- Were last season’s estimates accurate?
- Did the time you invested in certain areas pay off financially?
- Did you incur any surprise costs?
- Where did you incur the most costs?
Do the same evaluation process with products:
- What sold best?
- Was there enough variety in package options?
- Did some products do better in different age groups or sessions?
If you are seeing any kind of high costs, either financial or time, check whether the return was good enough to warrant it. Even if it is, finding a way to automate or streamline the process that uses up a lot of resources can help improve your workflow still further.
Agile Implementation
Now it’s time to fix the issues and hiccups you’ve just identified. What are the easiest solutions? Instances where you can see you are wasting a lot of time when you could be on a photo day could be solved by either hiring someone to take on that role or automating that process. Think about your position in the company: where do you thrive? What role do you want to have? If you prefer spending time on a shoot rather than handling paperwork, perhaps an office assistant or online system could enable to you to do so. Find a quick solve for the problem and test it.
The testing is vital. If you are introducing any new process, it is important to test it out before you reach high season. Start with a small job at the beginning of the season, or even ask a friend or neighbour to take part in a trial shoot. You get to test out your new ideas and they get some free photos. Win win!
Track the development of this new process and see whether it suits your business and solves the original problem. Be sure to collect direct feedback from everyone involved to get an accurate picture of how things went. You might need to refine it or make changes, but this is always worth doing if it makes the busy periods of the year that bit more manageable.
KPI’s
KPI’s (Key Performance Indicators) are a great way to manage goals and targets in a measurable way. The first step is to identify what to measure. Start by pinpointing the value drivers for your volume photography business. This could be anything: revenue per head, heads photographed, order rate, pictures taken – whatever is most important to you and your business. What is your USP (Unique Selling Point)? This can help narrow down what you should focus on improving within your business. For example, if you pride yourself on providing great customer service, a good value indicator could be your complaint rate. You shouldn’t have more than five targets; if there are any more, you will be overwhelmed and not be able to effectively handle any of them.
The next step is to think of your operation drivers. These are the things you can change that might have an impact on your value drivers. For example, influencing your time per head could raise the heads photographed numbers. Reducing admin time can increase the number of pictures taken, and so on.
Then consider the time frame for results. Do you want to evaluate per quarter, per job, or even per year? Regardless, you should check in on your KPI’s monthly, or even weekly, but it’s good to have on overarching timeline as well. It’s important to set specific targets, so you can evaluate successes and failures for the following season and the new set of KPI’s.
Using the SMART criteria can be a good means of making sure your targets are: Specific, Measurable, Achievable, Relevant, and Timebound. Keep your targets visible, perhaps in a spreadsheet or even a poster on the wall. You need to be aware of them throughout your workday and keep them at the forefront of your business decisions.
Tip: GotPhoto’s statistics can be a useful way of tracking and measuring relevant data. If you’re not sure how to make the most of these features, our customer service team is always available to help. You can call on +1 646-362-5100 or email support@gotphoto.com.
At the end of the KPI period, take a look at the results and see what worked. Then you can start the process all over again. This second round might include some of the same criteria as the first round, if your system still needs further refining.
Acquisition
If it’s still possible, putting some time into acquiring new schools could make this your best season yet. Some schools might already be tied to a contract, but it’s worth putting out some feelers in any case.
Materials
Establish a clear process between contacting initially, following up, and paying a visit. This makes sure that no schools get lost along the way and you deliver the same optimal introduction to every potential customer.
Polish up your positioning. Think about your USP again: what can you offer this school that no one else can? How can you prove it? Gather testimonials from other schools and include it in your materials that you hand out, along with your best images of course. Anything you can use to prove you’re the best photographer available should be up front and centre for the world to see.
Marketing
Set up targeted ads on Google or Facebook to catch schools that are still actively looking for a photographer. For more information on using targeted ads, check out our useful guide for Facebook ads here.
Put some time into the SEO (Search Engine Optimisation) of your website, or hire a freelancer to polish it up for you. You can be the best photographer in the world, but if no one sees your work when they’re looking for it, you still won’t increase the number of jobs.
Follow-Up
Once you’ve laid the groundwork, it’s always wise to follow up. People have busy lives and schedules, so make sure you’re present enough to catch their attention. Don’t give up if they say they already have a photographer, but rather show how you can be better. Even if they don’t change right now, it puts you in their mind for future consideration. Of course, don’t be so pushy that you drive them away, but making some calls and making a visit in person can really show people that you’re willing to go the extra mile and make them remember you.
Admin In Advance
Put It In The Calendar
All the dates you know in advance should of course be put in your calendar. Not only does it make sure you know what you’re doing and when, you can also set up reminders for a week in advance if there is anything that needs doing last-minute. For example, a sport session might need a particular prop that you need to dig out, or something else specific to an individual school.
If you work in a larger team, it can be worth having a physical year plan up on the wall. Digital calendars are great, but there’s nothing like having a physical plan for the year with the big dates and sessions marked. That way, everyone in the team knows the plan for the company and what they are all working towards. We even have several around our own office at GotPhoto!
Do Future You A Favor
You will thank yourself later if you can complete any admin that can be done in advance. Filling out data sheets for schools that require them or carrying out a stock check are some tasks where investing time in now can pay off later. You don’t want to be in the middle of high season and only then realising you are missing a vital supply.
Order Up
When ordering in to fill any stock items, you could also think about pre-planning anything special you might need for fall. Whether it’s a uniquely-themed background or a special prop, having some festive or seasonal specialities can encourage customers to make a purchase at the time.
Season’s Greetings
In a similar vein as having particular props or backgrounds, decide in advance on when you might have flash or seasonal sales. Christmas and Black Friday are of course key ones to consider, although you might have more that could suit your market.
Once established, you can then forward-plan your marketing schedule, or even create marketing emails or social media ads in advance. When you’re busy with photo days and sessions, you don’t want to potentially miss out on sales by not advertising your promotions to their best advantage. Once again, putting in the leg work now can really pay off during the season.
To hear more detail on how to prepare to the fall season, check out our webinar from our director Benedikt, or head over to our resources page for a wealth of information on all things volume photography.
Do you have any of your own annual preparations that you do before a big season? Let us know in the comments below or head over to the Facebook post for this article.
It can be tricky to post regularly on a social media account specifically focused on school and nursery photography. Between getting permission to post photos of kids and staying inspired to keep making unique and relevant content, it can be easy to fall out of the habit of regular posting. That’s why we have created this collection of ideas and inspiration to help you use your social media accounts to the best advantage of your school or nursery photography business.
For targeted help in building and creating posts on Facebook, both organic and paid, see these excellent blog posts in our social media series.
Who to Address
When you’re creating any sort of posts for social media, there are some important things to remember.
First things first: decide on a defined tone that matches your brand. If your school or nursery photography business tries to focus on family-orientated aspects, then adopting a chatty and personable tone in your captions is best suited. On the other hand, if you are looking to develop a more business-like style, the language should also match. Pick an option and keep it consistent, so as not to convey mixed messages to your audience.
Something that could also affect what tone you adopt is deciding on your audience. What do you want to achieve with your social media presence?
There are two main areas where you could help your school or nursery photography business flourish: either by helping generate sales of your products by targeting parents and families as customers, or diversifying and sharing your knowledge with other photographers. This can help generate revenue by enabling you to offer paid workshops or other educational materials. Regardless of the avenue you choose you should match the tone accordingly.
Engagement Tactics
To get the best engagement rates – this refers to the amount of people who click or otherwise interact with your posts – there are a few smart tactics that you should employ across the board.
- Using mixed media is a great way to catch people’s attention and generate better engagement. For example, posting a range of photos, videos, or GIFs keeps your feed interesting, vibrant, and attractive to a range of people.
- Your social media posts should not only be diverse in terms of format, but also content. Mix it up with educational or informative content, interspersed with more light-hearted or funny posts. Furthermore, if you are always posting promotional content about services or products you offer, it can come across too salesy and not genuine enough for people to really want to engage with your feed.
- It can be difficult at first to get the level of engagement or feedback that you might want, but don’t be disheartened! This is completely normal in building up social media content. Keep experimenting with your posts through A/B testing, or split testing. You can find out more in-depth information about A/B testing in this guide from VWO. Once you find out what works and what doesn’t, you can recreate similar content, or even reshare top-performing posts where relevant.
Handy Tools
There are various tools that you can use to take full advantage of social for your school or nursery photography business.
Scheduling platforms are a must-have. They mean that you can plan and build your posts ahead of time across platforms. This affords you the time and flexibility to be creative, as well as create coordinated and thought-out campaigns across several days or even weeks. It also makes it easy to collaborate as a team if you have other people working with or for you. There are a variety of options for you to use; Forbes has compiled a list of different scheduling tools, highlighting their respective pros and cons.
When creating content to post on social media, tools like Canva can also be useful in creating professional designs to support your work. Canva offers templates for graphic design posts, and you can search according to the platform you want to post on, making it easy to find the right design for your needs.
Ideas To Post
As mentioned above, you should be clear on who you are trying to target with your content before you start posting. That’s why we’ve collected some examples and ideas of social posts, and split them between the two audience groups we described earlier: prospective customer parents and other photographers.
Post Ideas For Other Photographers
Share Your Knowledge
Everyone loves to be in the know, particularly when it comes to the school and nursery photography industry. Social media is an excellent avenue for showcasing your expertise in the field. To really take advantage of this and build up your profile, you can put together informative posts that contain links to your various existing blogs.
Sharing your articles on social media is of course one way to generate traffic and views, and offers a greater range of diversity in the content you can share.

The breadth of topics you could discuss is wide and varied, from business tips to style advice in photography. And each of these larger topics has many more detailed areas to dive into such as acquisition, technical set-ups, how to impress parents and schools, etc.
Live video is also a great place to go to answer questions and directly engage with your audience. Facebook’s algorithm promotes video and live content higher than regular posts – it even pushes out notifications to your existing followers that a live video is coming up. This therefore attracts more people to your page and impresses your existing followers. Similar to the topic ideas above, there are various topics that can inform a live video. Viewers can comment in real time and engage with what you’re doing, allowing you to immediately address any questions that you might have. You can also download the content from these videos later and edit them into a How To on a specific subject – win-win!
Other photographers could also benefit from small snapshots into the behind the scenes of your work. For example, Instagram Stories is the perfect place to show how you set up for your photoshoots, what your post-session workflow looks like, or even something as quick and easy as ‘what’s in my bag?’
Something else that could be popular amongst fellow photographers and get across some of your personality would be sharing a Spotify playlist you made yourself, like ‘Songs To Listen To While Editing Photos’.
If you wanted to go into more detail and offer a collective insight not only to an aspect of your work, but also your brand identity as a business, a branded video is a great way of getting this across. You can integrate clips of you in action on a session with footage of you speaking for example.
GotPhoto created our own version of just such a video. It is a clear example of incorporating brand elements into an explanation of who you are as a business. This is something you can also do as a photographer to clearly show your character as a photographer and business.
Create Value
To get the attention of photographers who might be interested in this sort of content, you could also do giveaway posts. Even giving away something small, like a voucher for a camera company or small props that can help out on a photoshoot can attract the attention of budding photographers. It’s also worth asking photography equipment companies or similar if they can offer you a free prize, in return for you advertising their services, so as to avoid any extra expenses on your end. Make the requirements for entry sharing or commenting on your post, so as to widen the reach of your post organically.
To create more content that is relevant to photographers, stay in tune with what’s going on in the photography world. Share links to important industry news updates, like a new camera model release or reviews of certain useful equipment reviews. The more value you can offer your audience, the better!
Create A Community / Increase Direct Engagement
Try and build up a real community in your audience. Using posts like polls, available on both Facebook and Instagram Stories, encourages your audience to get involved with your content with minimal effort from them. It also helps gather useful data from your audience that could be used to further inform future content – win win! Questions comparing angles, or choosing between the before and after edits of the same photo are just a couple of examples of what you could ask on your social media pages.
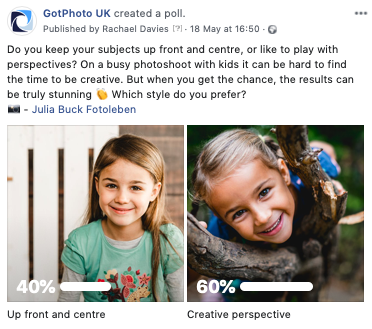
You can also try and ask those questions without the poll function. Photographers in your community will usually have an opinion on whether they like a picture more in colour or monochrome, and might even leave you a comment. This level of engagement might not arise with a poll. As we said: keep experimenting!
Remember to give what you want to get when it comes to interaction and engagement as well. If there are photographers from within your industry who you respect, but are not necessarily a competitor such as photographers from another area of the country, repost their content. They might then do the same in turn for you, and spread your posts wider.
Furthermore, sharing free content, such as blogs, price lists, or tutorials, is added value to your followers at no extra cost or time investment from you. Who knows, this could even lead to collaborations, like joint workshops, that could broaden your horizons as a business.
Finally, do not be afraid to directly ask your audience for advice or their direct feedback and even suggestions on what interests them. Building a community is always important when it comes to engagement. Putting yourself on the same level as your followers and asking honest questions makes you more relatable. Keep the topics relevant and related to photography, and watch the replies roll in.
Post Ideas For Customers
For this group, generating more sales of your photography products is the main aim. For that reason, using your platform to show off your skill and the quality of your work is the driving message.
You can therefore post content such as customer reviews or testimonials from parents and also from schools and nurseries themselves, of course. This allows you to get across the best parts of your business with the added validity of an impartial voice. Our experience is that most photographers are quite shy about singing their own praises. It’s important to remember, however, that it is perfectly okay to share your happiness about a satisfied customer’s comment. So don’t be shy!
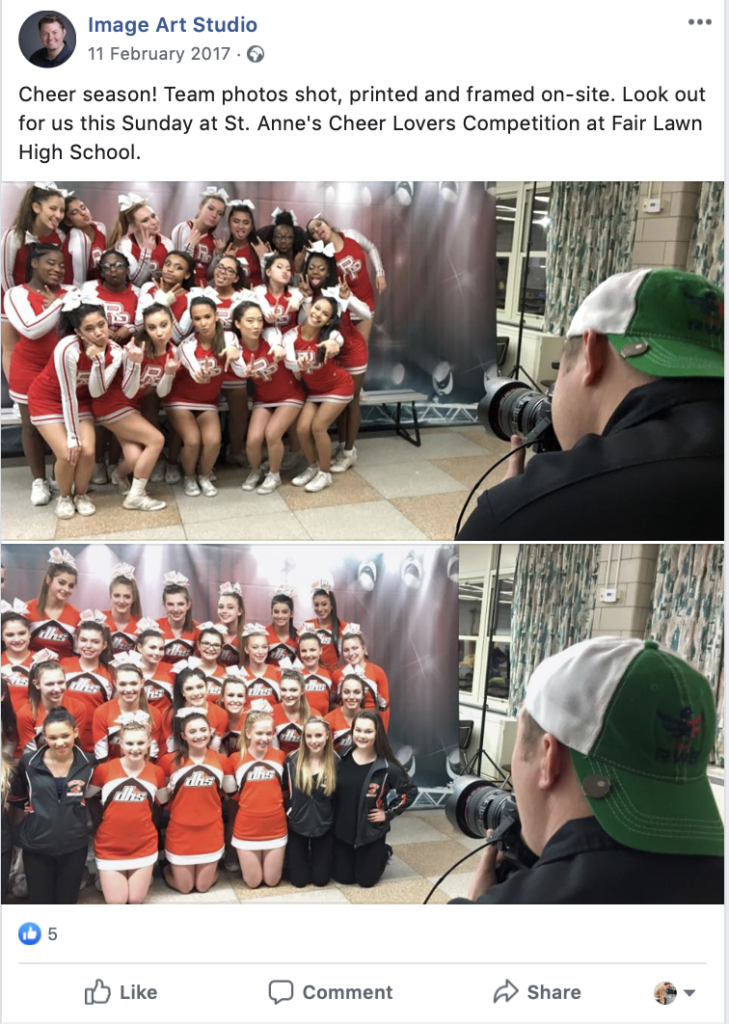
If you aren’t getting a lot of reviews – ask for them! Use your platform to put out a call for feedback, either in general or on a specific aspect. For example, if you recently ran a particular service, such as during prom season, see what your audience think of some of your photos. Of course, only choose photos that you’re proud of for posts like this. It may be scary, but it is worth taking the plunge.
Similarly, you can also ask your customers for their perspective on your photos and specific details. For instance, you can edit the same photo in different ways – black and white versus colour – and ask which they prefer and why.
You can also use your social media pages to advertise special offers. Perhaps a parent who was on the fence about buying will be motivated to spend when they see a limited time offer. Don’t miss out on convincing those last few customers.
In the same vein as garnering attention amongst photographers with competitions, you can do the same with customers. The same rules apply: encourage your audience to share or comment on your post, and offer something of value to them. For customers, this is easy: your services! It could be something big, like a dedicated family session, or something smaller, like a voucher for money off their next purchase from your shop.
Post Ideas For Both: End Customers and Photographer Colleagues
There is of course content that can work for both audiences, but the specific content should be targeted to suit the taste of your chosen audience in particular.
A Laugh A Day

As said above, it’s best not to go too heavy on promotion. Try putting in some funny posts to keep it interesting. To post a more diverse range of content, you can also vary it between memes or gifs, so as to mix up your feed visually. Always be sure to fit the tone and the visual style of your channel.
Posting relatable content is also important. Your engagement will do far better if people can identify with the content you’re posting. So if you want to connect with parents, post content about family life or the reality of parenting. Whereas if you want to reach photographers, post funny relatable observations about the everyday life of a working photographer.
It’s all about the timing. If you keep an eye on prominent holidays, you can time content to days that people will be excited for. Of course do the big ones, such as Christmas, Easter, and Halloween, but also keep note of other relevant days. Back to School, International Children’s Day – these are always great days that you can post on to engage more with the school photography community.
Keep It Current

In addition, be sure to keep your audience up to date on the big dates in the running of your own business. Workshops, big photodays, anniversaries, the release of new content, podcasts, a website redesign, a new gallery or product range – anything that is an important milestone for you could be interesting to share with your audience.
Not only does it connect you with them on a more personal level, it also emphasises the success of your business and enhances your brand image.
The Personal Touch
With that in mind, you must ensure your personality shines through in your posts as well. This does of course depend on what you decide for your branding: if you prefer to keep it strictly professional, then it might not fit. However, there are likely many parts of your business that are both personal and professional at the same time. They don’t necessarily need to contradict one another.
You shouldn’t underestimate how much a touch of your personality alone can help people identify more intimately and on a more personal level with your posts. Throwback posts or sharing your favourite images with a little story behind them can help to give a sense of you as the photographer behind your photos.
You could even try and inspire your audience by including tips on your technical setup or inspirational quotes to help people stay motivated. This is of course particularly relevant if you are posting with other photographers in mind, but quotes related to kids or child-related motivation will also go down a treat.
These are just a few ideas of content you could share with your audience, but the best part of social media is that it is all within your control. Get creative, dedicate some time to thinking outside the box, and you’ll certainly be able to engage more fully with your followers. Think about what you would like to see on social media, and get posting!
Do you still have questions, or perhaps some ideas of your own about what to share on social media? Share them in the comments of the Facebook post related to this article!
Social media has been more popular than TV or radio for years now. Millions of users hop on to Facebook everyday and like, comment and share what they see. In doing so, they provide information about themselves that you can use to your advantage in marketing your school or nursery photography business.
However, huge amounts of data will bring you nothing if you cannot analyse it correctly. That’s why this week we’re explaining the potential results of Facebook ads and how you can understand such data.
Do you want to first learn how to successfully market your school or nursery photography business on Facebook without spending a penny? Then take a look at our article on using Facebook Without A Budget. Or get the inside track on paid Facebook ads with our follow-up article Facebook With A Budget.
Why Work In Hindsight?
Posting different campaigns at random is like finding a needle in a haystack. You will struggle to establish what works best and won’t be able to optimise your marketing strategy.
With the right analysis, you can open up so many more opportunities to make the most of Facebook ads. Aside from that, you also don’t waste time, energy and budget on unnecessary campaigns. Facebook does a lot of work on optimisation itself. However, you should still check regularly that everything is running smoothly for your ads. This way, you can also simultaneously glean information to improve future campaigns.
Check results
You can check up on the performance of your Facebook ads in the Ads Manager. There are various different tabs for the account overview and the respective advertising sections, such as campaigns, ad sets, and ads. In our article on the topic of Facebook Marketing With A Budget, you can find out more about the specific sections.
Account Overview
In the account overview of the ad manager, you can easily find general information about your ad account. The performance of all your ad sections is summarised here. For example, it shows how many potential customers saw your posts (impressions) and how many link clicks you gained from Facebook ads.
In addition, you receive demographic and geographical information about the users you’ve reached. You can also see this in the specific tabs for each section. The relevant menus and features of the sections are very similar.

All the information is presented in diagrams to give you an insight overview.
Campaigns

In the campaign menu, you can find all your created campaigns listed. You can also use filters so as to only show active campaigns. Always be careful to pay attention to which filters you have already activated. Otherwise, something could quickly go amiss.
Ad Sets

In this menu, you can find all created ad sets, both active and inactive. Just like in the campaign menu, you can select an ad set with a checkbox and only show ads that belong to that group.
Ads

Finally, you can see all posts from all campaigns in the last tab – or once again, just the posts belonging to a specific campaign or ad set. You will be shown a preview of the picture belonging to each ad, so you can quickly recognise your various posts.
The four different tabs for account overview, campaigns, ad sets, and posts work in very similar ways. As mentioned above, almost all the features we explain can apply to all menus.
Organise Data
In each tab, there is a drop-down menu in the top right with which you can organise your ads by date and time. You can choose different time frames or simply choose to see the last week or month from the data presets.
It’s important to remember here that all the presets that begin with ‘last’ do not include the current day. So, if you choose last week, for example, it will show the most recent week up until yesterday.
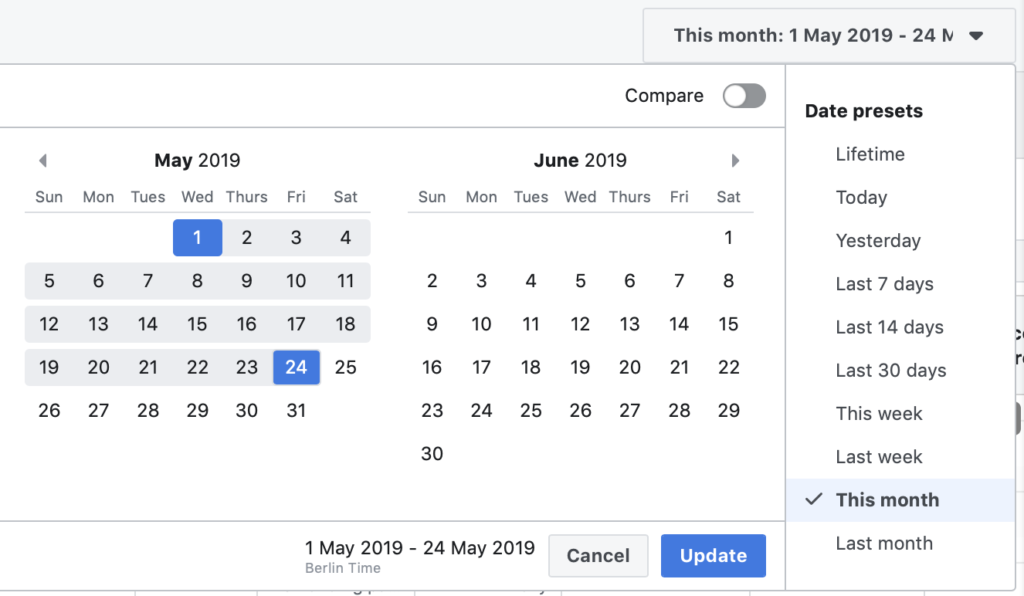
If you want to explore the performance of a campaign for school or nursery photography, you should take a look at several different time periods: a short one and a long one.
In doing so, you can see an overview of the total duration of the campaign, as well as its current performance. A campaign which has produced many link clicks throughout its duration can become less successful in its last few weeks. This could be a trend that you wouldn’t notice if you only looked at one time span or the other.
Know Your Way Around
Next to the first column containing the name of your campaign, you will find many other columns with information about delivery, budget, etc.
Organise Columns
Facebook automatically chooses some standard analysis figures for your campaigns to display. You can however individually customise the columns. Click on the top-right button pictured below and choose ‘Customise columns’.
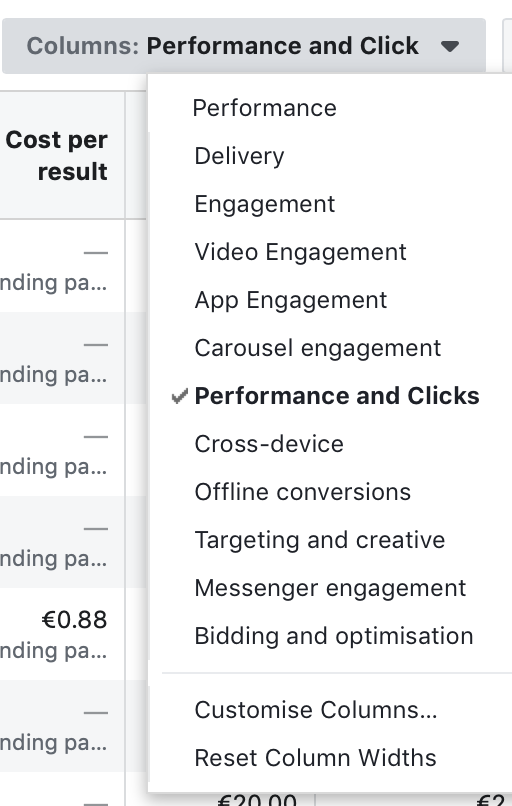
In this menu, you can choose specific analysis criteria from the various parent settings, such as delivery or costs. It all depends on what is most relevant to you and your business. The display will then reorganise itself to display your chosen criteria.
There are numerous sets of data to choose from. We have listed what we think are the most important ones here:
- Performance (and Clicks): results, reach, impressions (every time a user saw your ad), amount spent, and CPC (cost per click)
- Interactions: post interactions (clicks, comments, shares)
- Clicks: individual link clicks, CTS (click-through-rate means how often your ad is clicked in relation to the number of impressions)
- Conversion: Note here the actions that customers have taken in response to your ad that you want to investigate. You will need Facebook Pixel for this, which you can find out more about it in our article Facebook With A Budget
You can save your customised column preferences as presets on the bottom left.
The Attribution Window
For effective evaluation of your conversions, it’s important to set the attribution window to your preferences. You can find it in the settings of your ads manager.
Facebook’s preset time frames are ‘1 day after viewing and ‘26 days after clicking’. That means that you only see conversions in the ad report that happen within 26 days of clicking or 1 day of viewing. If you like, you can change this to suit your preferences via the attribution settings.
Statistics

For every campaign, ad set, or post for your school or nursery photography business, you can display specific data to do with ad performance. Simply select ‘View charts’ immediately below the campaign name and a sidebar will appear with visual statistics, making it easier to spot trends and successes.
The sidebar window contains a new menu with tabs such as ‘performance’, ‘demographic’, and ‘placement’.

Within ‘performance’, you can see how many people with an interest in school or nursery photography you have reached, for example, or how many have clicked further on your post, or even how much your campaign or ad set has cost you so far.
Within ‘demographics’, you can find relevant details to the people who have either seen your posts or clicked on your links. For example, it could show you whether you reached parents in their 30s for a nursery photography campaign.
Within ‘placement’, you will see how your content did on various social media channels that also belong to Facebook. This is of course only relevant if you chose to place ads on other channels.
You can also filter according to computer or mobile device, to compare data collected from users on different devices.
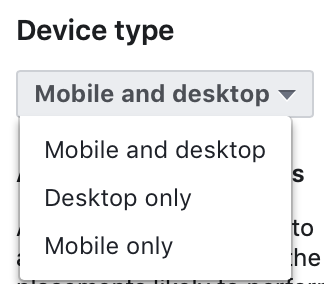
Breakdown
In addition to the data displayed in the various columns in an overview, you can also use so-called ‘Breakdowns’. Click on the drop down box of the same name.
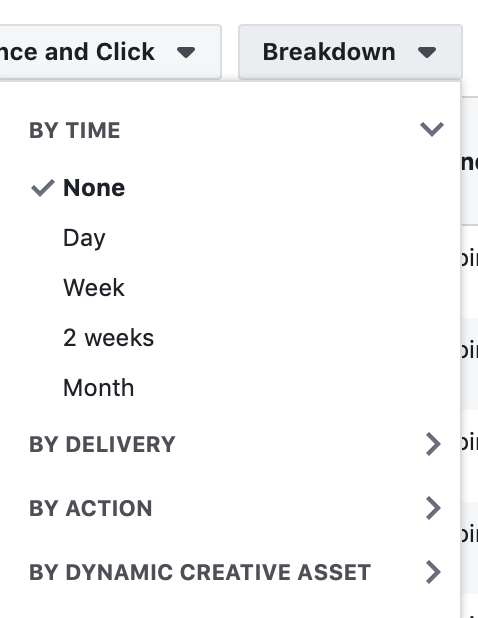
As implied in the name, this function will break down the campaign, ad sets, and individual posts according to different criteria for you. That means that you can see detailed insight into a particular focus point.
Within the three main categories, time, delivery, and action, there are also sub-categories:
- Within time: day, week, two weeks, month
- Within delivery: age, gender, region, placement, device, time of day, etc
- Within action: conversion device, reaction, destination, etc
If you choose a breakdown by day, for example, you will then receive detailed analysis in the existing columns for each day that your post has been online for. This could include how much a post cost each day, or how many impressions it achieve each day.
Breakdowns can be a useful way to find out on which social media channels your ad sets were best received. It could also show you which days of the week you achieved the most conversions at the lowest price.
Hashtags
If you have used a hashtag on Facebook for a competition or similar special event, then you can also use such tools to measure their success. For example, a seasonal sale or Christmas could be drawn together with a festive slogan, or you could help boost sales at prom season with a targeted promotion.
If you have asked your users to share the post with the hashtag, you can search for it specifically, either directly on Facebook, or by using an external tool, like the free Social Searcher software.
Understanding Results
You now have a wide-reaching overview of all results achieved with your Facebook ads. The next step is to really understand these findings. You can then optimise your next marketing campaign and refine your strategy with well-informed input.
Make Comparisons
In case you have already run a few campaigns for your school or nursery photography business, it can be very helpful to compare your old results with the new. This way you get an overview of what has improved and what has not gone so well. You can make such comparisons very easily in the Ads Manager. Comparing similar campaigns run at different times of year, such as at the beginning of a school year versus the spring season, can help you gauge what time helps you get the most engagement from potential customers.
Open the drop-down menu for time frames and activate the compare button. Choose two time frames that you want to compare with each other and click on update.
Now you can select each separate column in your overview to see detailed comparisons on each data set. You can therefore find out, for example, if there are certain seasons where your audience is more likely to click through on a link.
Was It A Success?
In the different columns, you can sort each campaign, ad set and individual ad according to different data sets. For example, you can choose for only those campaigns with the biggest reach to be shown.
With this ranking, you can then find out the most and least successful characteristics for your ads for school and nursery photography. Be sure to mark them in the check box.
With one click, you can now open your selected campaigns in the statistics menu on the right hand side. Diagrams with detailed analysis will show up in the sidebar, as explained above.
You can then make direct comparisons and find out what contributed to their success or failure.
You could compare the following aspects:
- What target demographic was most successful?
- What length campaign worked best?
- What text or headings achieved the most amount of link clicks?
- Which CTA text were the most influential?
Corrections
When you have worked out which particular post or ad sets work better than others, you can make relevant changes to future campaigns. Raise the budget of successful ad sets, or combine ads with high-performing images with those with high-performing captions. The world is your oyster!
In addition, you can also find out the best times of year from your data results, where your ads achieve the best results. Within these times, you can run your most important campaigns.
A Few Final Tips
Save and Automate Reports
Of course, it takes time to regularly collect the findings of your school and nursery photography ad findings, and you could easily forget to do so during the hustle and bustle of everyday life.
Facebook’s Ad Reporting tool allows you to set up automatic reports every week about the results of your Facebook ads, sent to you by email.
Click through to Ads Manager – Reporting in the main menu of the Ad Manager and click on ‘Create’ to start a new report.

Just like in the tabs for campaigns, ad sets, and individual posts, you can choose data categories and breakdowns for your reports according to what is most important for your goals.
As soon as your report has been created, choose the drop-down menu near the ‘Save’ button on the top right. Select ‘Save as’; it will then open a small window which gives you the option to select how often it will send you a report by email.
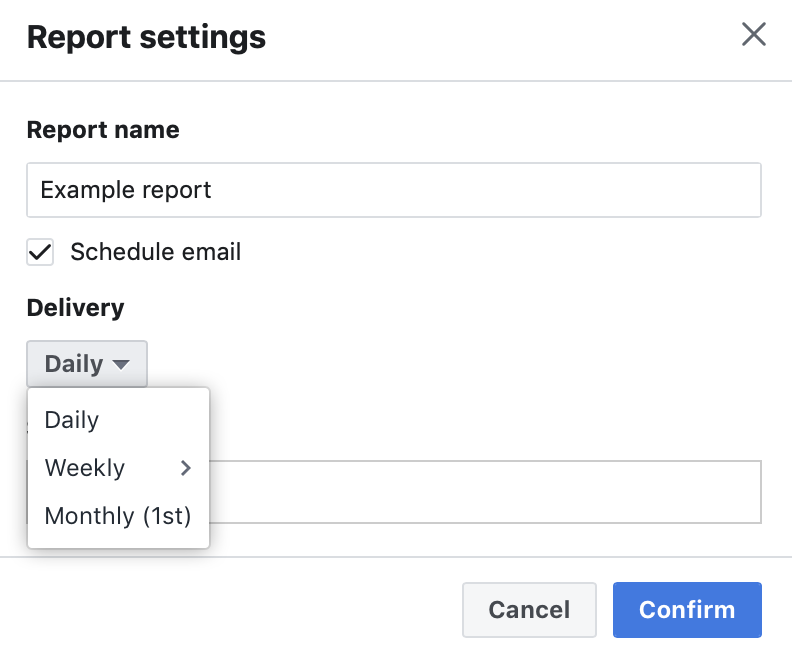
Give Facebook Time to Learn!
Facebook uses an algorithm to optimise your posts. Despite being intelligent and highly useful, it needs time to learn at first. That means that it can take a little bit of time to collect data and get to know the target groups and campaigns for your school and nursery photography business.
You should therefore be careful not to change the settings in the Ads Manager too often. Always wait for two or three days to make changes, so as to give the Facebook algorithm enough time to learn and adapt. If you don’t, the learning process up until then is wiped clean and Facebook essentially has to start all over again.
This also applies to making changes to budgets for your Facebook ads. Make sure you don’t make too big a jump too soon. Always raise your budgets in small steps, between 10 and 15% at a time, so as not to confuse Facebook.
Listen To What Works
Even the best posts can not run forever. At some point, everyone relevant in your target group will have seen your content and decided on whether or not they want to take action. The data for frequency is a good indicator of such trajectories.
When the performance of your ad decreases, you should take a look at the frequency information. Sometimes it can be enough to make a small change to your post to make it interesting for your audience again. That doesn’t always work, however. In general, you should regularly renew your ad campaigns.
Test, Test, Test!
In order to carry out corrections, you need several test runs, of course, where you can test out different photos or captions against each other in otherwise identical posts. This process, called A/B testing, is well-practiced and proven in marketing.
In general, it’s all about trial and error on Facebook. Instead of pondering over different formulations for ages, you should just try out something new and see what sticks. The end result is different for every target group and you only find out what works by trying it yourself.
Do you still have questions or tips of your own about analysing data from Facebook? Share them in the comments of the Facebook post related to this article!
